Choosing the right Saddle Connector can determine whether a piping connection remains stable, sealed, and serviceable over time. This small component often carries a surprisingly important responsibility. A poor match may create leaks, uneven pressure, or difficult maintenance near the pipe wall. Experienced installers usually examine more than size alone. They check the pipe material, outside diameter, branch outlet, operating temperature, and working pressure.
Details matter.
A reliable selection process also considers installation conditions. Is the pipe exposed to sunlight, buried underground, or placed inside a crowded mechanical room? A connector that performs well in a clean workshop may become troublesome around dirt, vibration, or limited access. Material compatibility deserves careful attention, especially when joining dissimilar plastics or metal systems. Manufacturer specifications, certified test data, and project standards should guide the final decision.
Real projects are rarely perfect. Measurements can be rushed, product labels may be unclear, and field conditions can differ from drawings. That is why confirming dimensions with calipers, reviewing sealing surfaces, and checking torque requirements can prevent expensive rework. I have found that installers sometimes focus on the fitting and overlook the surrounding pipe condition. That assumption needs challenging. The strongest choice balances structural support, sealing performance, corrosion resistance, installation time, and future inspection needs. These seven practical tips will help readers compare Saddle Connector options with greater confidence, while recognizing when professional engineering advice is necessary.
7 Tips for Choosing the Right Saddle Connector
Understand the Purpose and Working Conditions of a Saddle Connector
Before choosing a saddle connector, define its job. Is it for a service branch, pressure tapping, repair, or drainage? The purpose determines the outlet, sealing method, and load path. Check the host pipe’s material, outside diameter, wall thickness, and surface condition. Nominal size alone is not enough. A connector fitted to a corroded or oval pipe may leak, even when the listed size looks correct.
Working conditions matter more than appearance. Record operating pressure, temperature, flow velocity, soil moisture, vibration, and chemical exposure. The U.S. EPA’s seventh Drinking Water Infrastructure Needs Survey estimates $625 billion in drinking-water investment needs over 20 years. Aging systems demand careful compatibility checks. The WHO and UNICEF Joint Monitoring Programme reported that 2.2 billion people lacked safely managed drinking water in 2022. Small connection failures can worsen service reliability.
Choose a connector with verified pressure ratings and suitable gasket materials. Review test standards, installation torque, bolt condition, and access space. Confirm whether the design supports live tapping or requires shutdown. Inspect the pipe before installation. Clean surfaces thoroughly. Uneven tightening is a common weakness. Field teams should record measurements and test results, although records are sometimes incomplete. That deserves correction. A pressure test after installation can expose slow seepage before the connection is buried. Also consider future maintenance, corrosion protection, thermal movement, and whether replacement parts will remain available.
7 Tips for Choosing the Right Saddle Connector
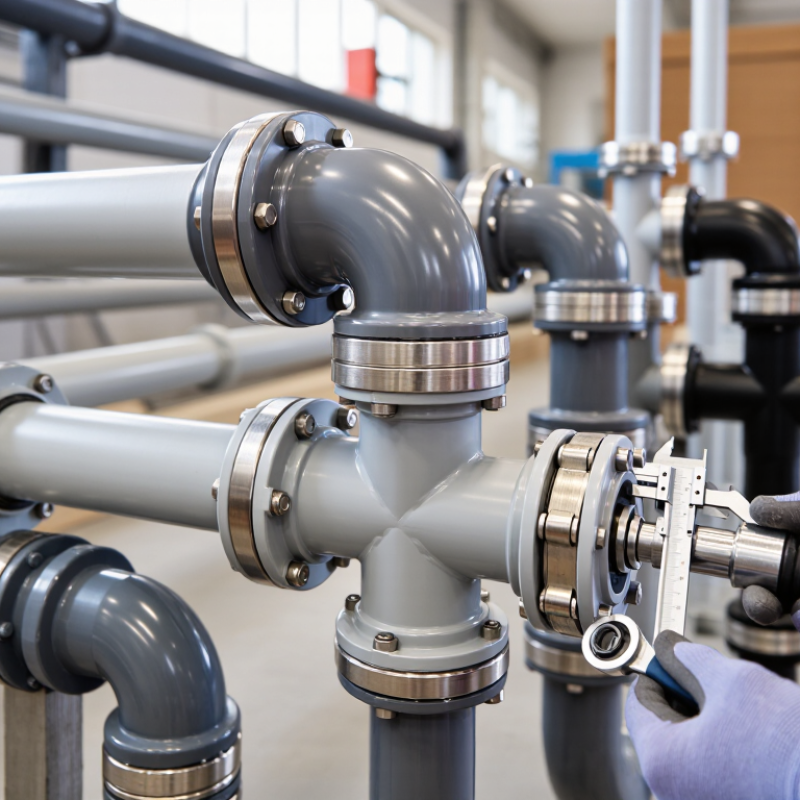
Tip 1: Match the connector size with the pipe or cable’s actual outside diameter. Do not rely only on nominal size. Measure the surface with calipers, especially after insulation, coating, or protective wrapping is installed. A connector that looks close may still leave pressure points or unwanted movement.
Tip 2: Check the saddle curve against the pipe or cable shape. The connector should sit evenly, without rocking or forcing the material into position. For flexible cable, include the outer jacket in your measurement. For rigid pipe, confirm the wall thickness and external coating. I have learned that small differences become obvious during tightening.
Tip 3: Review the manufacturer’s sizing table, installation instructions, and applicable technical standards. Confirm the connector’s load rating, material compatibility, and recommended tightening method. A hand-tight fit can be misleading. If the connector is slightly loose, vibration may create wear over time. If it is too tight, it may damage the jacket or pipe surface. Measure twice, then inspect the finished fit from several angles. A second check is worth the few extra minutes.
7 Tips for Choosing the Right Saddle Connector?
Material compatibility should guide every saddle connector decision. A connector may fit perfectly and still fail in service. Check the pipe material, clamp alloy, seal compound, and transported fluid together. Dissimilar metals can create galvanic corrosion when moisture bridges their surfaces. ASTM G82 offers a practical method for evaluating galvanic corrosion risks.
Environmental resistance matters just as much. Identify exposure to salt spray, soil chemicals, ultraviolet light, cleaning agents, and temperature cycles. ISO 12944 classifies atmospheric corrosivity from low indoor conditions to extreme industrial and marine environments. A connector suitable for a dry plant may deteriorate quickly beside a coastal pipeline. The NACE IMPACT study estimated global corrosion costs at 3.4% of worldwide gross domestic product, or about 2.5 trillion dollars annually. That figure makes small compatibility checks less trivial.
Inspect the installation area, not only the product sheet. Look for trapped water beneath the saddle, damaged coatings, and sharp edges that can cut seals. Confirm pressure and temperature ratings under real operating conditions. Field inspections often reveal that “chemical resistant” does not mean resistant to every concentration. This is where specifications become imperfect. When conditions are uncertain, request immersion, aging, or cyclic exposure data from an independent laboratory. A short trial on a representative pipe section may prevent a costly replacement.
7 Tips for Choosing the Right Saddle Connector?
A reliable saddle connector begins with the installation method. Match the connector to the pipe material, outside diameter, and branch size. Check whether the work requires a dry installation or controlled drilling under pressure. For bolted models, inspect gasket placement, bolt access, and tightening sequence. Uneven torque can create a small leak that appears weeks later. I once treated torque as a minor detail. That shortcut was a mistake.
Load capacity needs more than a published pressure number. Review working pressure, temperature, pipe wall thickness, and expected vibration. Consider water hammer, soil movement, and the weight of attached valves or fittings. A connector may tolerate static pressure but fail under repeated movement. Ask for test data, material certificates, and installation limits. An engineer should verify the design when the branch serves critical equipment or buried piping.
Maintenance needs should influence the choice before installation. Select corrosion-resistant materials for wet, chemical, or outdoor environments. Leave enough clearance for visual checks and bolt access. Record the installation date, torque values, pressure rating, and inspection findings. Inspect for rust, gasket seepage, distortion, and loose hardware. Keep it simple. A six-month inspection may prevent an expensive shutdown. Still, maintenance intervals should follow site conditions, service history, and applicable codes rather than habit. The best choice is not always the strongest connector; it is the one technicians can install correctly and inspect without guesswork.
| Tip | Selection Factor | What to Evaluate | Typical Options or Reference Values | Recommended Choice | Maintenance Implication |
|---|---|---|---|---|---|
| 1 | Match the Installation Method | Determine whether the connector will be installed by drilling and tapping, clamping, bolting, or a no-shutoff tapping procedure. | Mechanical clamp saddles are suitable for external installation; service saddles may require a corporation stop or tapping valve; electrofusion saddles require controlled heating and cooling. | Choose the least invasive method that meets the pressure, access, and shutdown requirements of the project. | Poor installation alignment or inadequate surface preparation can lead to leakage, loosening, or premature replacement. |
| 2 | Verify Pipe and Branch Compatibility | Check the carrier-pipe material, outside diameter, wall thickness, branch size, pressure class, and connection standard. | Common systems include ductile iron, steel, PVC, PE, copper, and other thermoplastic or metallic pipes. Nominal diameter alone is not sufficient because outside diameters vary by pipe standard. | Select a saddle designed for the exact outside-diameter range and pipe material, with a branch outlet matching the downstream fitting. | Incorrect fit may create point loading, pipe deformation, gasket extrusion, or difficult future removal. |
| 3 | Confirm Pressure and Load Capacity | Evaluate internal pressure, surge or water-hammer conditions, branch loads, vibration, soil movement, and any external mechanical loads. | Typical water-service fittings may be rated around PN10 or PN16, equivalent to approximately 10 or 16 bar at the applicable reference temperature; actual ratings vary by design and material. | Use a connector whose pressure rating exceeds the system design pressure, including transient conditions, and provide independent support for heavy branch piping. | Overloading can cause bolt relaxation, gasket damage, pipe cracking, or a sudden leak; inspect after pressure changes or ground movement. |
| 4 | Choose the Correct Material and Corrosion Protection | Consider fluid chemistry, soil resistivity, moisture, temperature, ultraviolet exposure, and contact between dissimilar metals. | Common choices include ductile iron with protective coating, stainless steel, carbon steel with corrosion protection, bronze, and engineered thermoplastics. Material suitability depends on the service environment. | Use compatible materials and isolate dissimilar metals where galvanic corrosion is possible. Confirm elastomer compatibility with the conveyed fluid. | Coating damage, rust staining, or exposed metal should be repaired promptly, especially in buried or constantly wet installations. |
| 5 | Check Sealing and Leak-Control Features | Review gasket profile, sealing material, contact area, bolt pattern, and whether the connector seals around the pipe without damaging its surface. | EPDM is commonly used for many water applications; other elastomers may be required for oils, fuels, chemicals, or elevated temperatures. Gasket performance is application-specific. | Select a gasket rated for the fluid and operating temperature, and follow the specified tightening sequence and torque procedure. | Gaskets are wear components. Look for seepage, compression set, cracking, swelling, or loss of elasticity during scheduled inspections. |
| 6 | Assess Space, Tools, and Installer Access | Measure the working clearance around the pipe and allow space for torque tools, tapping equipment, inspection, and future repairs. | Two-piece bolted saddles generally need access around the pipe; fused or tapped designs may need specialized equipment and controlled installation conditions. | For restricted spaces, select a compact design only if it can still be installed, torqued, tested, and inspected correctly. | Limited access increases the risk of under-torqued bolts and makes later inspection or gasket replacement more difficult. |
| 7 | Plan Inspection and Maintenance | Define inspection intervals based on pressure, environment, criticality, accessibility, and consequences of failure. | Above-ground installations are easier to inspect visually. Buried installations may require documented installation records, pressure testing, corrosion monitoring, and leak detection. | Prefer a design with accessible fasteners, replaceable seals, corrosion-resistant components, and clearly documented torque and testing requirements. | At minimum, inspect for leakage, corrosion, coating damage, bolt condition, pipe movement, and signs of gasket deterioration during planned system checks. |
Note: Pressure ratings, load limits, temperature ranges, gasket materials, and installation procedures must be confirmed against the applicable product documentation, pipe standard, local regulations, and project design conditions.
7 Tips for Choosing the Right Saddle Connector
Compare safety standards, material quality, installation fit, load capacity, corrosion resistance, supplier documentation, and long-term cost. Start by checking the connector’s intended application, such as conduit size, pipe diameter, environment, and connection method. Safety markings should be clear and traceable. Verify them against current local requirements, not only a sales description. This step often takes minutes. It can prevent expensive rework.
Examine the material closely. Smooth edges reduce damage during installation, while consistent thickness improves strength and alignment. For damp, outdoor, or chemically exposed areas, select suitable corrosion protection. A connector that looks strong may still fail under vibration or repeated temperature changes. Check the stated load and operating limits. Do not guess. Ask for test records, installation instructions, and quality-control information when details are missing.
Consider the full service life, not just the purchase price. A reliable saddle connector should install firmly, remain stable, and allow reasonable inspection later. Confirm that tools, fasteners, and replacement parts are readily available. I once chose a cheaper fitting for a small project, then spent more time correcting poor alignment. That experience still influences my checks. Some assumptions can be wrong. Review the connection after installation, especially where movement, moisture, or heat may affect performance.
Use this 100-point evaluation framework to compare saddle connectors by safety standards, build quality, installation reliability, and long-term value. Confirm each score with current manufacturer documentation, applicable standards, and site requirements.
The weighting emphasizes compliance and safe performance first, followed by material durability and lifecycle cost. A higher percentage indicates greater importance during purchasing and technical review.
A connector can fit perfectly and still fail during service. Check the pipe, clamp, seal, and fluid together.
Moisture can bridge different metals and create galvanic corrosion. Inspect joints exposed to rain, soil, or condensation.
Review salt spray, soil chemicals, ultraviolet light, cleaners, and temperature cycles. Coastal areas need extra caution.
No. Resistance may change with concentration and temperature. Specifications are not perfect.
Look for trapped water, damaged coatings, and sharp edges. Sharp edges can cut the sealing material.
Check clear, traceable markings against current local requirements. Ask for test records and installation instructions.
Vibration and repeated temperature changes can weaken a seemingly strong connector. Do not guess the operating limits.
Not necessarily. A low purchase price may lead to poor alignment, extra labor, and earlier replacement.
Review the connection for movement, moisture, and heat effects. A short field trial may reveal hidden problems.
Choosing the right Saddle Connector begins with understanding its purpose and the conditions in which it will operate. Consider whether it will be used for pipe branching, cable support, alignment, or another application, and assess factors such as temperature, pressure, vibration, moisture, chemicals, and outdoor exposure. The connector should match the pipe or cable dimensions precisely to ensure secure attachment, proper load distribution, and reliable performance. Material compatibility is also essential, especially when the connector will contact metal, plastic, insulation, or corrosive environments.
Before making a decision, evaluate the installation method, available workspace, required tools, expected load, and future maintenance needs. A practical design can reduce installation time and make inspection or replacement easier. Finally, compare safety standards, manufacturing quality, durability, and total long-term value rather than focusing only on the initial price. Selecting a Saddle Connector that meets application requirements and offers dependable performance can improve system safety, reduce maintenance problems, and support a longer service life.

Minde